
Creating a full system image backup in Windows 11 is essential to ensure the safety of your data and system settings. A system image is a complete
Creating a full system image backup in Windows 11 is essential to ensure the safety of your data and system settings. A system image is a complete snapshot of your operating system, including files, applications, and settings. This backup can be restored if your system crashes or you face a hardware failure, allowing you to return to a fully functional state without reinstalling everything from scratch.
Windows 11 offers several built-in tools to facilitate the creation and restoration of system images. These tools are accessible through the Control Panel and advanced startup options, allowing users to choose different methods based on their preferences or situations. Whether you’re looking to protect your system before upgrading or preparing for potential failures, creating a backup is critical.
This tutorial will guide you through two fundamental methods for creating and restoring system image backups in Windows 11. Each technique is designed for specific scenarios, such as using the traditional Control Panel interface or accessing the advanced startup recovery options when the system fails to boot normally. By following these steps, you can ensure your system is protected and your data remains intact.
How to Create a System Image Backup via Control Panel
This method leverages the traditional Control Panel interface to create a complete system image backup. It is suitable for users who prefer using the graphical interface and need to back up their entire system, including system settings, applications, and files.
- Open the Control Panel
To start the process, open the Control Panel. To do this, press the Windows key, type “Control Panel,” and press Enter.
- Select “Backup and Restore (Windows 7)”
Within the Control Panel, navigate to the “Backup and Restore (Windows 7)” option. This tool allows you to create a system image backup in Windows 11.
- Click on “Create a System Image.”
In the “Backup and Restore” window, click the “Create a system image” link on the left-hand side. This option will enable you to back up your system to an external drive, DVD, or network location.
- Choose the Backup Destination
A prompt will ask you to select a destination for your backup. You can choose an external hard drive, DVDs, or a network location. Once you’ve chosen your destination, click “Next. “

- Confirm Your Backup Settings
Review the settings in the confirmation window, ensuring all necessary drives are included in the backup. Click “Start backup” to begin creating the system image.

- Wait for the Backup to Complete
Once the process starts, it may take some time, depending on the size of your system. Wait for the backup to finish, and ensure you don’t interrupt the process.

How to Restore a System Image Using Advanced Startup Options
This method is helpful if your system cannot boot normally. The advanced startup options allow you to restore a system image when Windows 11 has failed to load, ensuring you can recover your system without losing essential files or settings.
- Open Advanced Startup Options
To access the advanced startup options, restart your computer and hold the Shift key while selecting “Restart” from the power menu. This will launch the recovery options. If this fails, please check our guide about accessing advanced startup options.In the advanced startup menu, select “Troubleshoot “. This option provides system recovery tools, including restoring a system image.

- Choose “Advanced Options”
Within the “Troubleshoot” menu, click “Advanced options” to see more recovery tools, such as system image recovery.
- Click on “See more recovery options.”
Click “See more recovery options” in the advanced options menu to view additional restoration tools.

- Select “System Image Recovery”
Click on “System Image Recovery “. This will allow you to restore your Windows 11 system from a previously created system image backup.
- Wait for System Image Recovery to Load
After selecting the system image recovery option, wait for the recovery environment to load.

- Select Account and Enter Your Password
When prompted, choose your Windows account and enter the corresponding password to proceed.

- Choose a System Image Backup
Windows automatically detects system images stored on external drives or network locations. Select the appropriate backup file and click “Next.”


- Choose additional restore options.
If you wish to configure additional restore options (e.g., formatting or partitioning drives), do so here. Otherwise, click “Next “.
- Re-image Your Computer
To begin the restoration process, click “Yes” to confirm the re-imaging of your computer.

- Wait for Disk Restoration to Complete
The system will now restore the backup image. Depending on the backup size, this process may take some time. Once completed, your system will reboot, and your Windows 11 installation will be restored to its previous state.

FAQ – Frequently Asked Questions About System Image Backups in Windows 11
Can I regularly automate the creation of system image backups in Windows 11?
Windows 11 does not include a direct built-in feature to schedule system image backups automatically. However, you can use the Task Scheduler to run the wbAdmin start backup command regularly. This command allows you to specify various parameters, including the backup location and which drives to include. For detailed steps, look up how to use Task Scheduler with wbAdmin to set up recurring system image backups.
How can I check the integrity of a system image backup in Windows 11?
To ensure your system image backup is not corrupted and is reliable for future restoration, use the wbAdmin start backup command with the “-verify” option in the Command Prompt. This command checks the backup’s data integrity. Also, regularly mounting the backup as a virtual hard drive and accessing its contents can serve as a practical integrity check.
Can multiple system image backups be stored on the same external drive?
Multiple system image backups can be stored on the same external drive, providing enough storage space. It’s crucial to organize the backups properly—consider creating separate folders for each backup, labeled by date and time, to ensure easy identification and retrieval. Moreover, ensure that each new backup does not overwrite any existing one unless it’s part of your backup strategy.
What should I consider when choosing a backup destination for my system image?
When selecting a backup destination for your system image, consider factors like storage capacity, transfer speed, physical security, and reliability. External hard drives are popular due to their portability and high storage capacity. Network locations (such as NAS devices) might offer advantages in accessibility and redundancy but can be slower over WiFi. Ensure the destination is secure and accessible only to authorized users to prevent unauthorized access.
How do I recover specific files from a system image backup without restoring the entire image?
To extract individual files from a system image backup, you can mount the backup VHD (Virtual Hard Disk) file in Disk Management. Right-click the Start button, select Disk Management, Action, and Attach VHD. Navigate to your backup location, select the VHD file, and attach it. Once mounted, it will appear as a standard drive on this PC, where you can copy files as needed.
How does Windows 11 handle system image backup on dual-boot systems?
In dual-boot setups, Windows 11’s system image backup tool only backs up the partitions required for Windows to run. This typically does not include other operating system partitions from the dual-boot configuration. Consider using a third-party tool that supports multiple operating systems and can handle backups across different partitions for comprehensive backups in such setups.
Are there any tools to help reduce the size of a system image backup?
Reducing the size of a system image backup can be achieved by using disk cleanup tools to remove unnecessary files before backup, optionally using built-in Windows tools like Disk Cleanup. Additionally, employing third-party compression software to compress the system image file post-backup can save space, though it might increase restoration time due to decompression requirements.
Can I restore a system image made on one PC to another with different hardware?
Restoring a system image to a different hardware setup can lead to driver and hardware configuration issues. Restoring to the same or very similar hardware configurations is generally recommended. If moving to significantly different hardware, consider using Sysprep or similar tools to generalize the Windows installation before creating a system image.
What happens if I interrupt the system image backup process?
Interrupting the system image backup process can render the backup file incomplete or corrupt, making it unusable for future restoration. It’s crucial to ensure that the backup process is not disturbed once initiated. If an interruption happens, it’s advisable to delete the incomplete backup and start the process anew to ensure the integrity of your backup.
Is it necessary to back up system images to an offsite location?
Backups stored offsite are protected from local environmental risks such as fire, flood, or theft. Maintaining backups in a geographically separate location is considered best practice, especially for businesses or scenarios where data loss would be catastrophic. Offsite backups can be facilitated through cloud storage services or physically transporting backup media to a secure location.
How can system image backup be restored if the Control Panel is inaccessible?
If you cannot access the Control Panel, you can still perform system image restoration using the Windows Recovery Environment. Boot from Windows installation media and navigate to ‘Repair your computer’> ‘Troubleshoot’> ‘Advanced options’> ‘System Image Recovery.’ Follow the prompts to select and restore from your system image backup.
Which file system is required on the backup destination for system image backups?
The backup destination must be formatted with the NTFS file system to support a Windows system image backup. NTFS is necessary for handling large files and provides security features that are unsupported by other file systems like FAT32 or exFAT.
What are the common errors to watch for during the system image backup process?
Common issues include ‘Insufficient storage space,’ ‘The drive is not formatted with NTFS,’ and ‘Failed to write data to the backup media.’ Ensure the backup media is correctly prepared, connected, and functioning properly. Running a chk disk can help identify and fix drive problems before initiating the backup.
How do I manually manage and delete old system image backups?
Old system image backups can be managed through the ‘Backup and Restore (Windows 7)’ option in the Control Panel. Here, you can view all the backup images stored and choose older images to delete. This helps manage storage space and organize backups effectively.
Why might a system image backup take longer than expected?
Factors affecting backup time include total data volume, the speed of both the source and backup drives, and system activity during backup. High-resolution data sets, using an external drive connected via a slow interface like USB 2.0, and high CPU or disk usage by other applications can significantly slow down the process. Ensure minimal usage and optimal connection technologies for quicker backups.
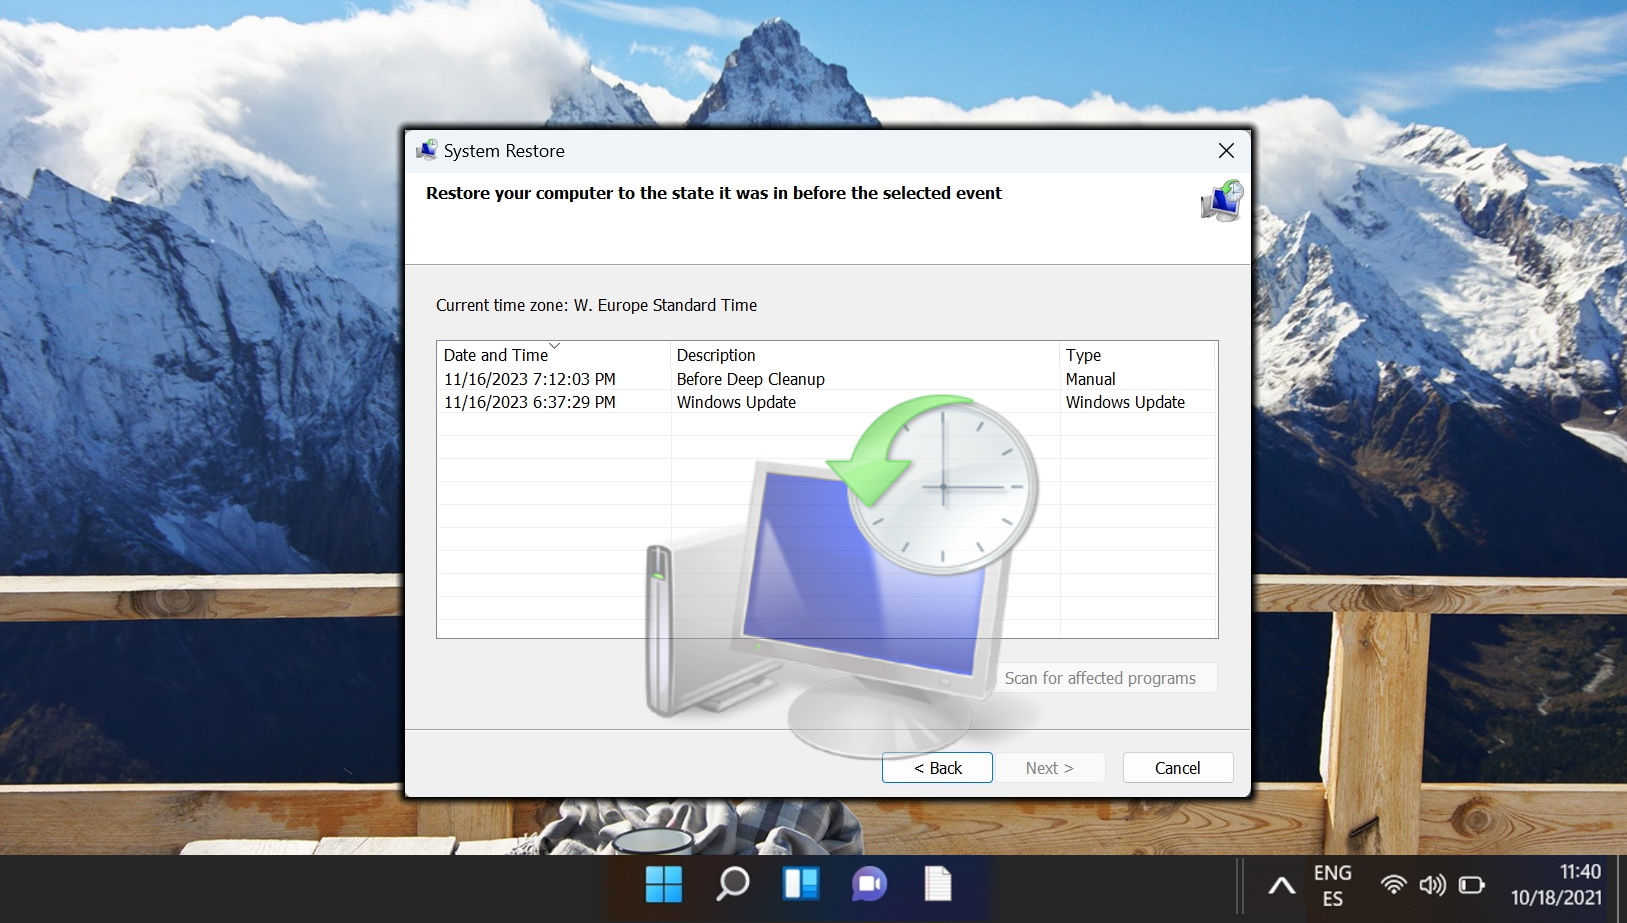
Related: How to Use System Restore in Windows 11
System Restore isn’t automatically active in Windows 11. Users must take the initiative to enable this feature, setting the stage for their system’s safety net. In our other guide, we show you how to create system restore points in Windows 11 manually or automatically and how to return to a previously created restore point.
Related: How to OneDrive Sync Any Local Folder with Mklink
OneDrive’s synchronization is limited to its designated folder. This limitation can be a hurdle when you want to seamlessly back up diverse data types such as images, downloads, or game saves. Luckily, you can bypass it using mklink, a command-line tool in Windows that creates symbolic links or directory junctions, allowing any local folder to sync with OneDrive. Our other guide shows you how to make a OneDrive link so you can OneDrive folder sync any local directory with your cloud drive.
Related: How to Reset Windows 11 or Windows 10 (Normal or Factory Reset)
If you have a persistent issue with your PC that you have been unable to fix, the best option is to reset your operating system. This will allow you to keep your files (refresh), remove everything, or perform a factory reset. In our other guide, we show you how to factory reset Windows 11 and Windows 10 using both Advanced Startup Options and the OS’s in-built Settings apps.
Share this content:
COMMENTS